Do you want to know how to make the device used in steel wool photography? Here, we will reveal what items are needed and how it is put together. By reading this article, you will know how to make a steel wool device, enabling you to explore steel wool photography.

Table of contents
Why Make A Steel Wool Sparkler Device?
The primary purpose of making a steel wool device is to produce steel wool photos. To create this effect, a long exposure is used to capture the movement of hot embers. The image below illustrates what a steel wool photo looks like:
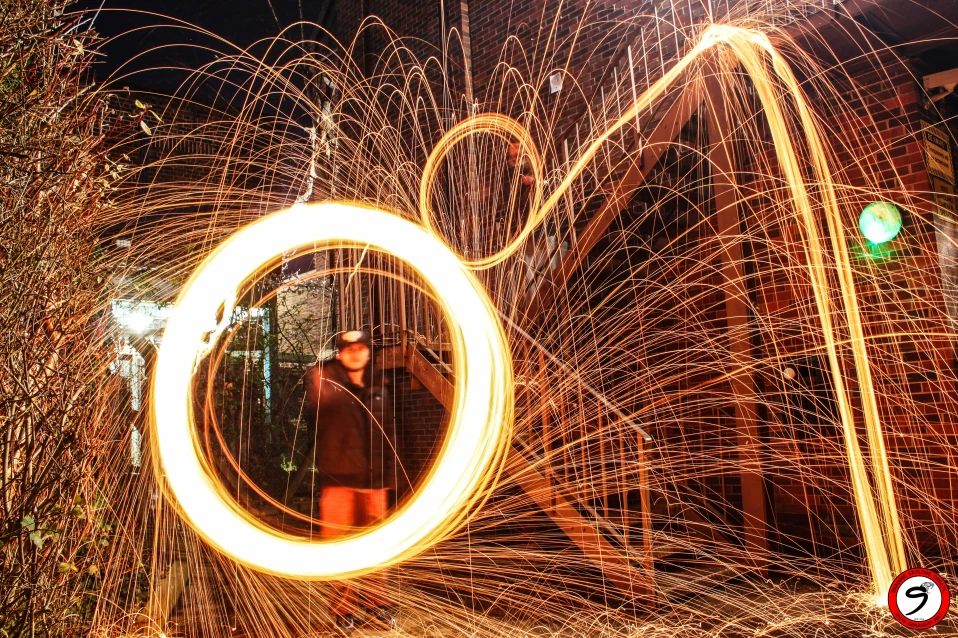
The working of the device is as follows. A material called steel wool is put inside a whisk and attached to a chain. The steel wool is set on fire then spun around in a circular motion. This creates gold streaks of light which are captured by the camera.
Steel wool sparkler device components
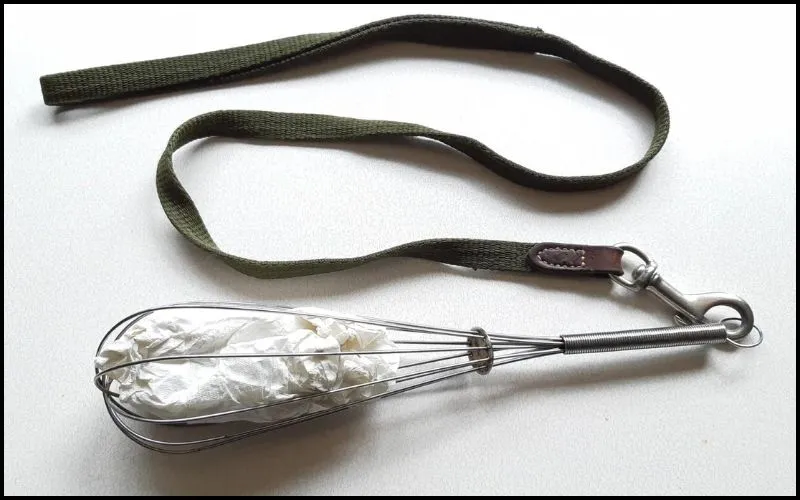
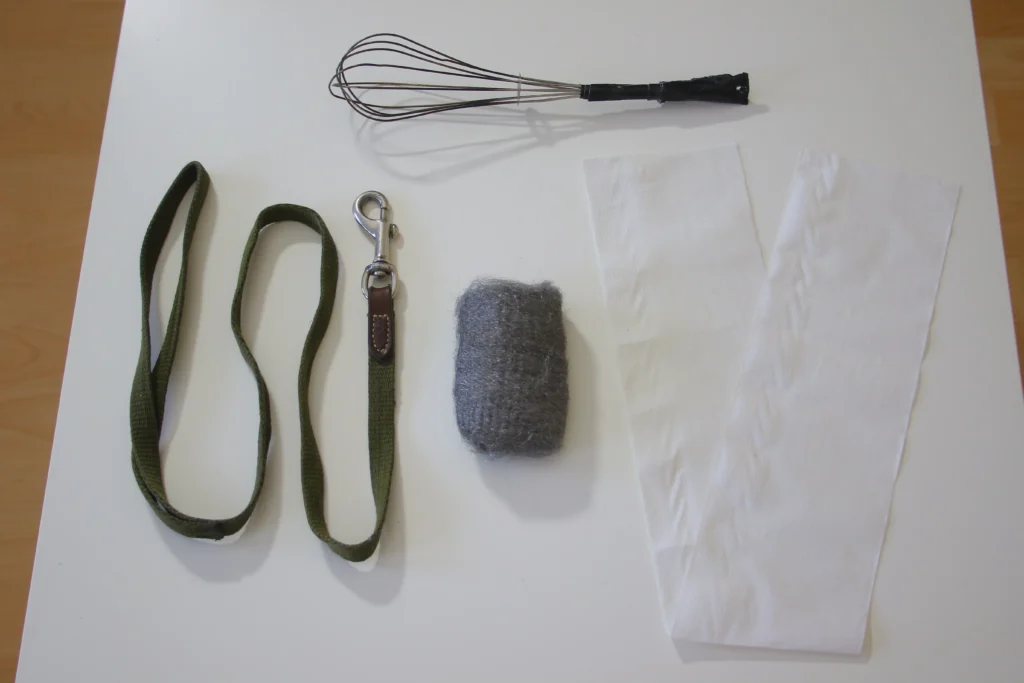
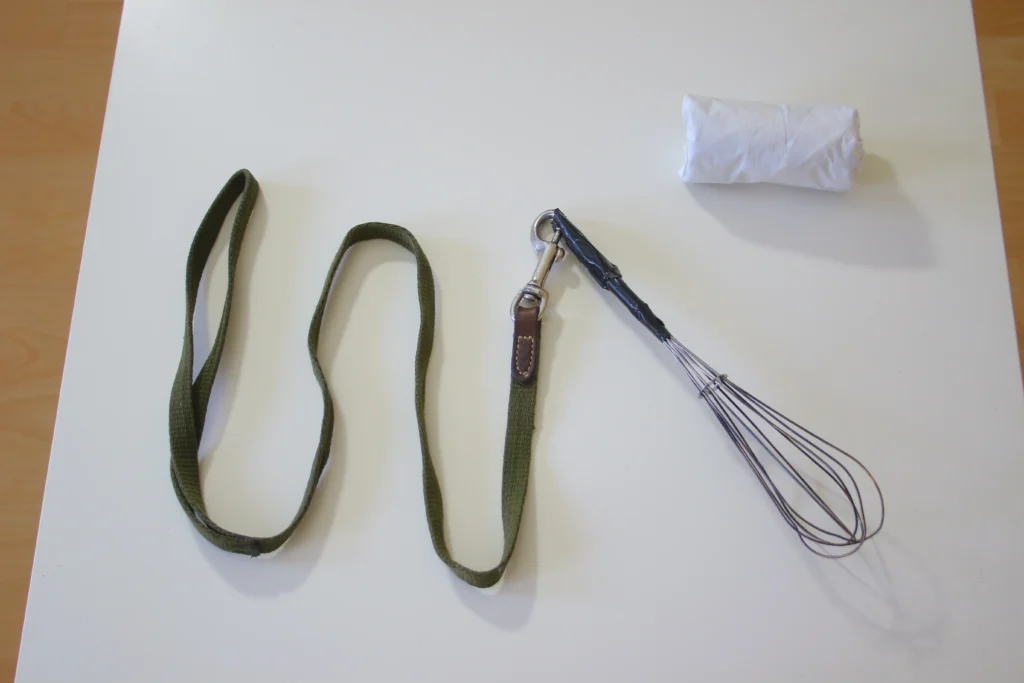
The steel wool device is not made up of many items. It is comprised of just four different components. These items must be acquired and assembled to build the steel wool device. The four simple components are steel wool, toilet paper, a metal kitchen whisk, and a dog lead. The forthcoming sections will describe all four components in detail.
Also read: After Dark Photography: Creating Magical Photos With Light
The Four Components Of A Steel Wool Sparkler
Steel Wool
The main and crucial part of the steel wool device is the steel wool itself. Steel wool is also known as wire wool and wire sponge. It is a bundle of thin steel wire used as a metal sponge for cleaning or polishing. Steel wool creates the sparks captured in a steel wool photo. You can purchase steel wool at your local hardware store, supermarket, discount store, or online. It is readily available to everyone.
Steel wool comes in various grades, but the finer grades work better. The grade of steel wool is displayed in words or numbers. When purchasing steel wool, get the finest grade available. The finest grade is labeled as ‘finest’ in words or ‘0000’ in numbers. The second finest grade is labeled in words as ‘extra fine’ or in numbers as ‘000’. The third finest grade is labeled in words as ‘fine’ or in numbers as ‘00’. Avoid using any other grades that have not been mentioned. The steel wool may not work as it could be too thick.
Also read: Exploring the World of Creative Light Painting Photography
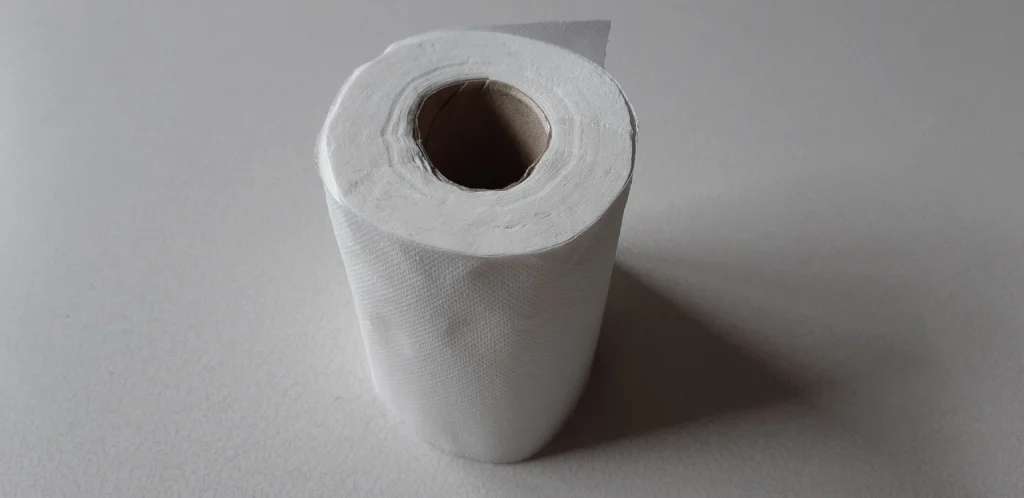
Toilet Paper
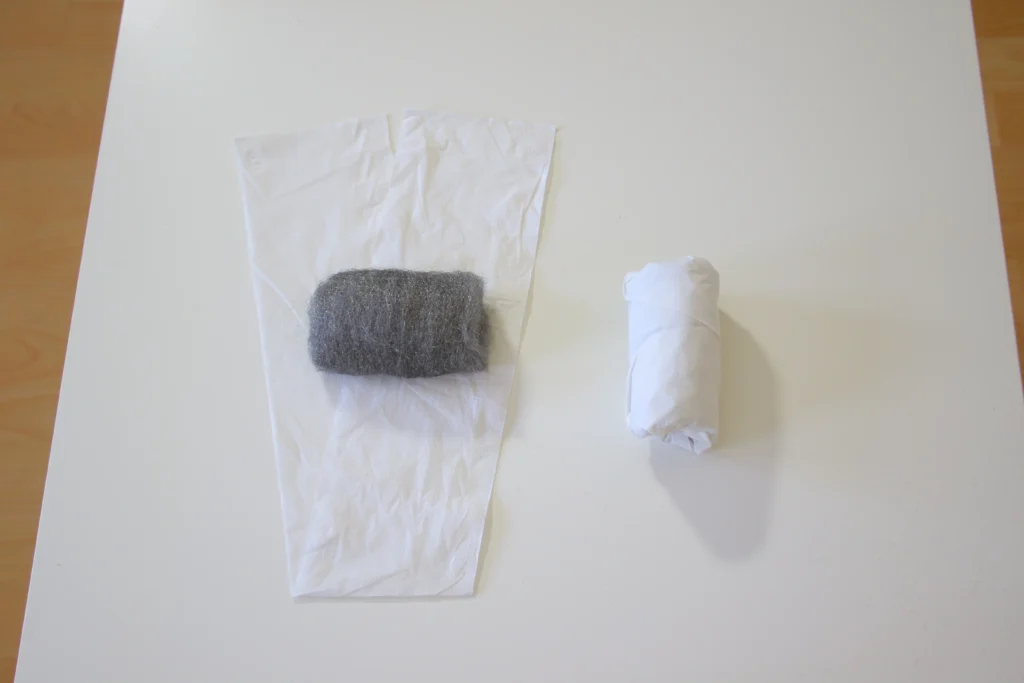
The next essential part of the steel wool device is toilet paper. You need this to wrap around the steel wool to facilitate the burning. A strip of toilet paper, five or six sheets in length, is sufficient for use.
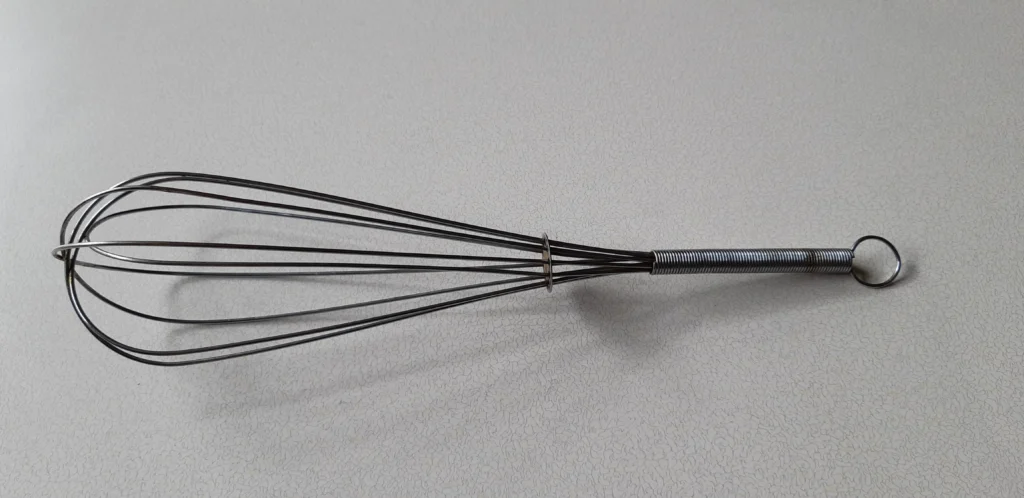
Metal Kitchen Whisk
A metal kitchen whisk is an important part of the steel wool device. This is because it holds the steel wool, and the gaps allow it to fly out. The whisk for your steel wool sparkler should have two imperative characteristics. First, it must be metal because a plastic one will melt. Second, it must have a loop at the end of the handle to attach a dog lead.
Check out: Masterclass: Light Painting Photography
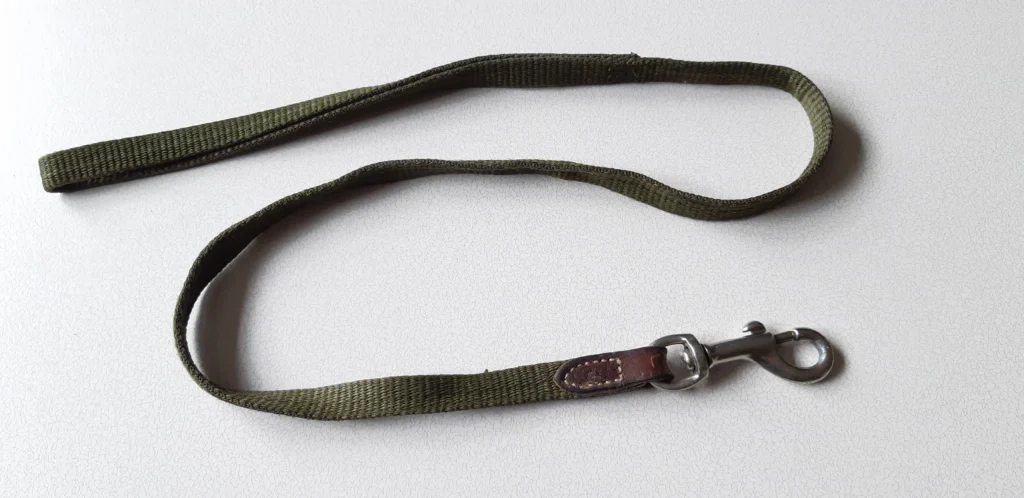
Dog Lead
The last component required for the steel wool device is a dog lead. This is to be attached to the bottom of the whisk. This enables you to swing the steel wool sparkler around. Alternatively, you could use something else, such as a lanyard, rope, cord, cable, or chain to attach to the whisk. However, it is better to use a dog lead for the following reasons. First, one end has a clasp, which makes it easy to attach to the whisk. Second, it has a handle that is convenient to hold.
Check out: A Beginner’s Guide To After Dark Photography
Steel Wool Device Assembly
The components described in the previous section form the spinning steel wool sparkler. You must assemble the steel wool device, so now we will explain the assembly. The process to make it involves five steps, outlined below.
Step one: Gather the steel wool, toilet paper, metal kitchen whisk, and dog lead you acquired.
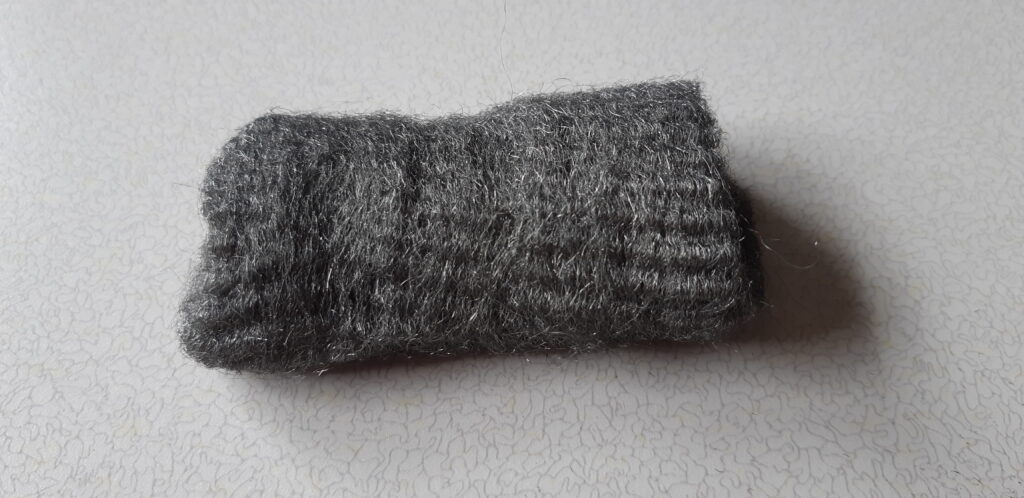
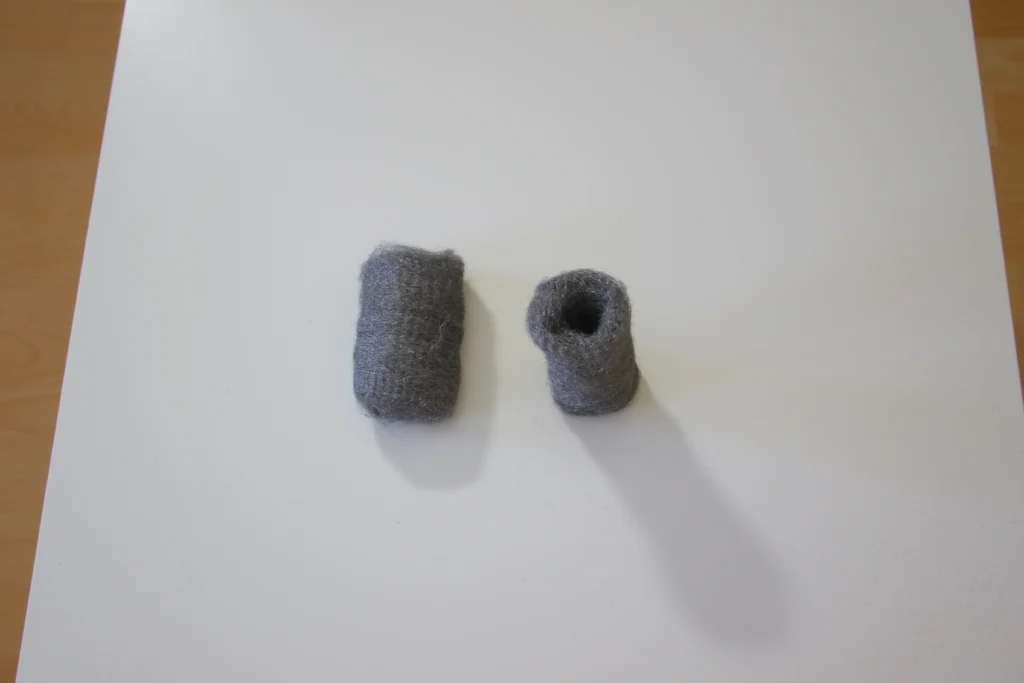
Step two – The sole concern of this step is preparing the steel wool. Take your steel wool, gently loosen it, and fluff it up with your hands. Do not rip anything off; gently pull it apart a little. After that, use your hands to hollow it out so it looks like the steel wool in the photo below. This maximizes the airflow and helps it burn better.
Step three: Cover the steel wool completely with toilet paper. Tuck the excess toilet paper in the holes at both ends to hold it in place.
Check out: Masterclass: Easy Yet Powerful Studio Lighting Tutorial
Step four: Get your dog lead and whisk. Attach the clasp on the end of the dog lead to the loop on the back of your whisk.
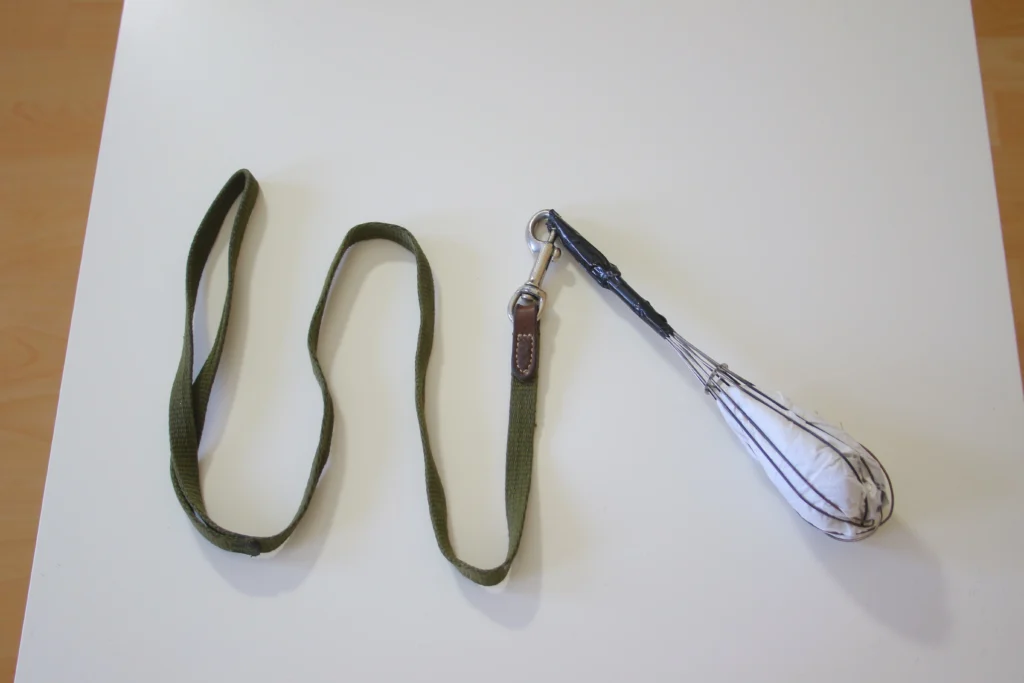
Step five: Wrap the steel wool in toilet paper and put it inside the whisk. You may need to bend the bars on the whisk to get it inside.
Check out: Striking Nature & Light Leak Overlays Bundle
Conclusion
Having learned how to build a steel wool sparkler device, you can take part in steel wool photography and create spectacular photos!
To take part in steel wool photography, it is essential to learn about it first. There also are imperative safety measures when undertaking steel wool photos. Therefore, we inform you that the information provided in this article is distributed on an “As Is” basis, without warranty. While every precaution has been taken in the preparation of this article, neither Gim Liu nor PhotoWhoa shall have any liability to any person or entity concerning any loss, injury, or damage caused or alleged to be caused directly or indirectly by the instructions contained in this article or by the equipment described in it. All readers are advised to proceed entirely at their own risk.
If you are keen to learn all about steel wool photography including all safety measures, here at PhotoWhoa we offer a great masterclass on it. You are able to take this masterclass here. This masterclass is comprehensive and teaches the entire process from start to finish.