Balance in photography is the silent force that holds a photo together. When done right, it creates a natural flow for the viewer’s eyes and makes your subject stand out. It also gives the whole image a sense of harmony. When done poorly, even the most interesting scene can fall flat.
The good news? Balance isn’t hard to learn. Once you understand it, your photos will instantly start looking stronger and more intentional. Let’s unpack this simple but game-changing concept.

Table of contents
So, What Is Balance In Photography?

Balance is a compositional technique that organizes aspects of the image within the frame to create equal visual weight. The visual weight of an element is an assessment of how much attraction it will have on the viewer.
Different aspects of each component change its visual weight to the viewer. Some are quite obvious, such as contrast, color, size, proximity, placement, and texture. Visual weight is a powerful compositional tool. It allows you to determine the image’s focal point. It can also be treacherous and contribute to a successful image or fail to help your composition.
The easiest way to understand balance in photography is to imagine the frame as a standard scale. To make a photo look appealing, the elements should be arranged on both sides. This helps create equal visual weight on each side of the frame.
There are many things a photographer must consider to create a balanced photo. This includes the size and location of the main subject and its distance from other elements in the image. Photographers also need to think about the contrast between colors, tones, textures, and light.
You might also like: Photography Terms Every Shutterbug Needs To Know
Types Of Balance In Photography
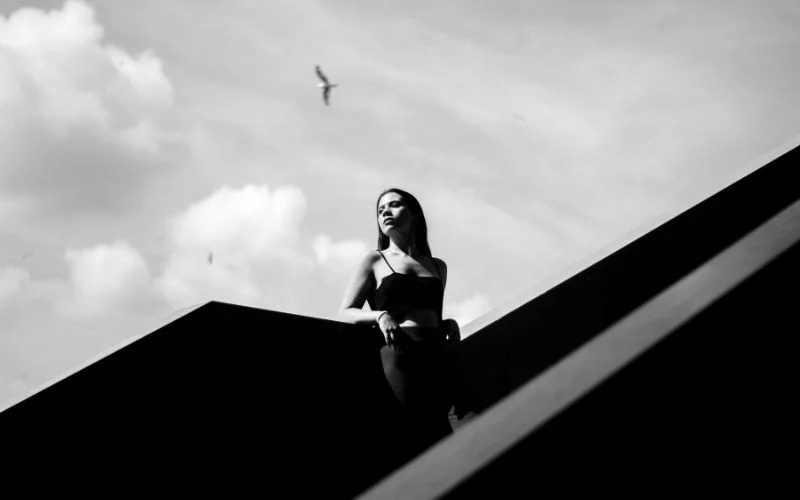
1. Asymmetrical Balance

Asymmetrical balance is also called informal balance. It is probably the most experienced balance and composition technique photographers use in tutorials and art workshops. Asymmetrical balance is the most challenging to execute. It requires that your subject not be positioned at the center of your image.
With some practice, asymmetrical balance will be easier to incorporate into your creative process. The rule of thirds will support the asymmetrical balance. The rule of thirds helps you place the subject in the best spot. You can place the subject about one-third in from the left or right edge. Or, you can place it one-third down from the top or one-third up from the bottom.
The best way to grasp this concept is to visualize a tic-tac-toe board drawn across your picture. The best place for your focus using asymmetrical balance would be on the intersection of two of the three lines.
Another way to use asymmetry in a creative composition is to pair your main subject with a secondary object. This secondary object should be less important or have less impact. It should also contrast with your main subject in size, color, or overall appearance.
2. Symmetrical Balance
The most common and most obvious means of arranging a balance in a photo is formal, or symmetrical balance. In symmetrical composition, one-half of the image is nearly identical.
Symmetrical photos are balanced, but not all balanced images are symmetrical. This is often the reason that beginning photographers center their subject in the photo.
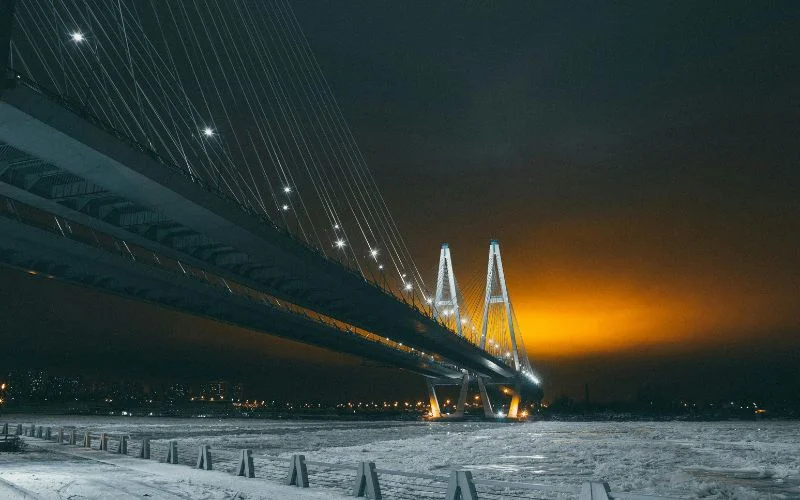
The most common symmetrical balance in photography is a horizontal split. This is because we usually see nature as a landscape, and most often, half of a landscape is not identical. However, the diagonal or vertical splits provide photos with just as much visual power.
You might also like: Best Podcasts For Photographers To Listen
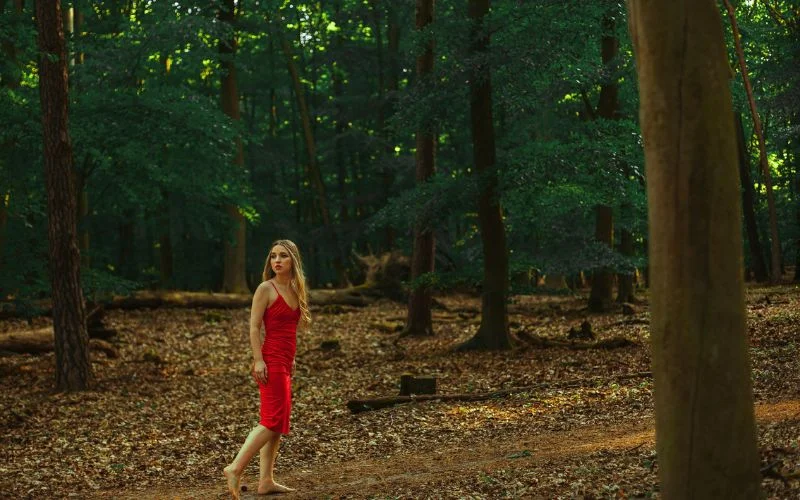
3. Color Balance

Vivid colors carry a far greater visual weight than neutral colors do. For example, picture a bright red apple and have that apple rest against a faded green pear. When asked which one they feel drawn to, most people will say apple without thinking twice.
It is the same idea with images that only have parts covered in bright colors. If you have a splash of color in an otherwise ordinary image, your eye will be drawn to that area. This will create a powerful focal point. Images with many vibrant colors will have visual weight and easily overpower you.
You must create a large area of neutrals to balance a small portion of bright colors. Inversely, you will need a larger area of colors to balance a small area of neutrals.
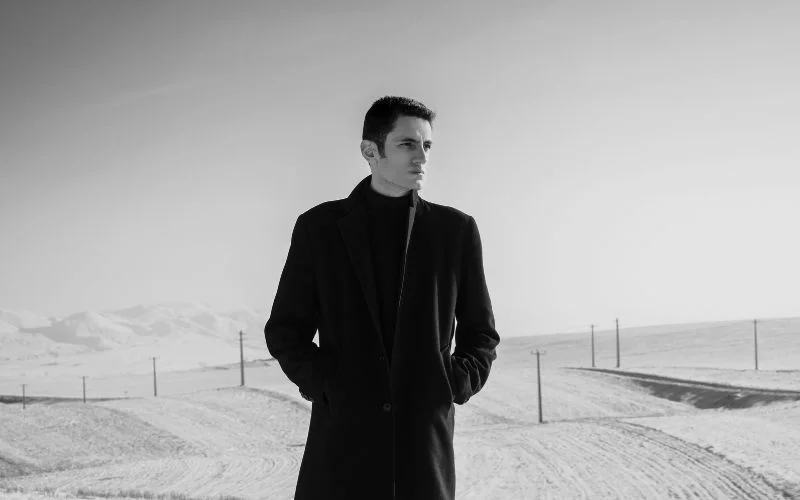
4. Tonal Balance
Similar to color balance, tonal balance focuses more on the intensity of light than the vibrance of color. In this respect, darker elements appear visually heavier than lighter elements.
This is much easier to notice in black-and-white photography. Removing the visual weight of color makes it much easier to see the contrast (literally).
To achieve the best tonal balance, incorporate significant, bright elements that can counterbalance the dark areas.
If your brightest tone is the main subject, try to place it near a light area. This will help keep it away from dark objects that might distract the viewer’s attention.
5. Conceptual Balance

Conceptual balance is a more philosophical form of asymmetrical balance. In this type, two subjects or ideas inform each other and don’t need to differ only in shape and size.
In many instances, an image achieves conceptual balance where two opposing textures offer distinct meanings behind each subject.
With that being said, it is obviously more difficult to compose a conceptually balanced image. It takes more than just a slight shift in the orientation of the frame.
You might also like: Shutter Speed In Photography: Meaning, Uses, Examples & More
Why Balance Or Unbalance An Image?

What is the importance of balance in photography? Why should one deliberately unbalance a photo? The answer is mainly emotional and involves flow. A balanced image feels calm, stable, and natural to look at.
Your eyes move around the frame comfortably, taking in all the elements without feeling lost. You won’t be pulled too hard in one direction. Balanced photos work best to invoke feelings of harmony, beauty, or order. That’s why you often see them in landscapes, portraits, and buildings.
However, breaking the balance can sometimes make an even stronger statement: an unabridged image might be dramatic, tense, or dynamic. It could cause the viewer to stop and feel restless or concentrate sharply on one tiny area. This effect can be great if one intends to put energy, emotion, or storytelling into an image.
As a matter of fact, it is important to understand what you are trying to achieve with balance or imbalance. Henceforth, directing your work photography in just the right mood and message will be very achievable.
How To Create Balance In Photography?
Experiment with In-Camera Options

There are options in your camera that provide a balance for your photographs. For example, grid overlays, focus peaking, and exposure meters. When composing your pictures, take advantage of those tools.
A grid can help organize your subjects according to the rule of thirds or symmetry. The focus points will direct your eye to see if your subject is ‘overwhelmed’ by the rest of your scene.
Use Contrast
When we talk about contrast, we think about light and dark. But contrast is how we pair things in composition for visual equality.
For example, you can place a bright object in context with the help of a darker background. You can also use a rough surface in contrast with a smooth surface to determine balance. Contrast balances competing visual forces in your photograph and directs your viewer’s eye to the main subject.
You might also like: How To Protect Images On A Website
Consider Your Subject

Think carefully about your subject’s size, shape, color, and position. A small, solid-colored object can establish visual balance when the rest of the frame is large and neutral.
Recognizing the visual weight of the subject helps determine its placement for maximum visual impact. This ensures the subject doesn’t overwhelm the balance of the overall frame.
Apply The Rule Of Thirds
The rule of thirds will divide your image into a 3 x 3 grid. Positioning your primary subject on these lines, especially at the intersection points, creates a natural balance and flow. This prevents your image from appearing too centered or “heavy” on one side.
Make Use Of The Leading Lines
Lines that can appear in your composition, such as roads, can guide the viewer’s eye through the image. They help create visual structure.
Leading lines can move visual weight and join the foreground and the background. They also help balance your subject in relation to the scene.
You might also like: Image File Format Guide: What’s the best Image File Format?
How Does Balance Affect Composition?

Applying balance in photography involves framing the scene in such a way that all its components have equal power in the composition. But first, one must break down the scene into components and give them weight and meaning in their minds.
From a visual perspective, you can think of the image as an aggregation of shapes, lines, textures, colors, highlights, and shadows. From a conceptual perspective, you can think of the image as an aggregation of objects, contrasts, actions, and emotions.
When you wish to introduce balance in photography, you must determine the relationship between elements. You cannot simply frame an image with what is available to you. You must consider how the camera-subject distance, camera settings, and shooting angle influence the relationship between elements. These factors can alter the weight of the elements within the frame.
Examples Of Balance In Photography
Symmetrical Balance Photography
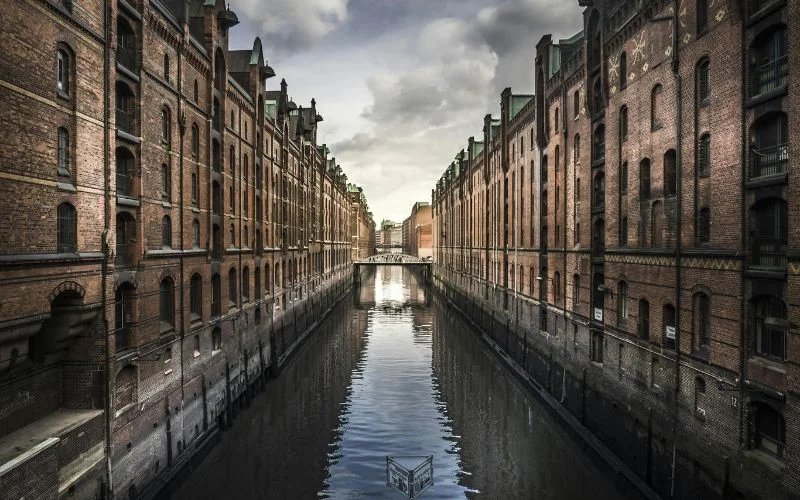
The buildings in the above image mirror each other almost exactly. The canal runs right through the center.
This pulls your eye straight down the middle of the frame toward the small bridge in the distance. This kind of symmetry creates a pleasing feeling and makes the image look neat and balanced.
You might also like: How To Sell Stock Photos Online | Top Websites To Earn Money
Asymmetrical Balance Photography
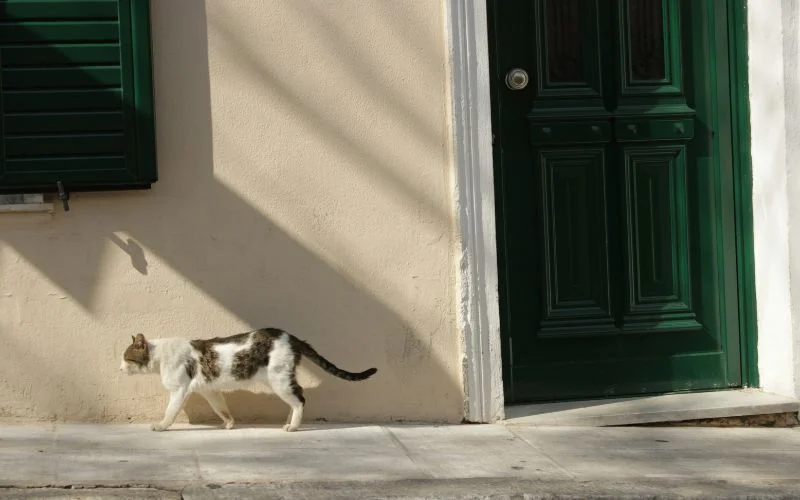
In the above image, the cat walking on the left side creates strong visual interest. The large green door on the right balances the frame without matching the cat’s size or shape.
Even though the two sides aren’t identical, the image still feels stable and complete. The shadow lines and the space around the cat add extra balance.
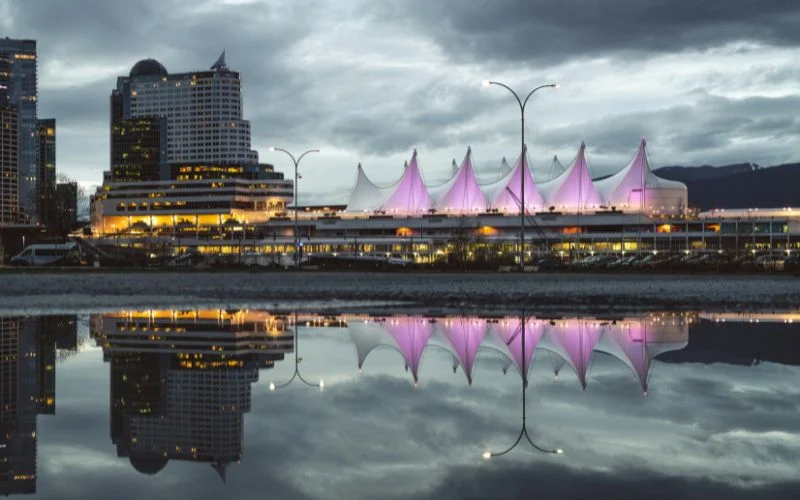
Color Balance Photography

This photo is a great example of color balance in photography! The bright colors are spread evenly across the frame. Each color pops without overpowering the others.
The photographer places these colors so your eyes naturally move from one element to the next. This creates a sense of harmony. The warm wooden background also balances the cool and warm tones.
You might also like: Creative Rainy Day Photo Ideas
Tonal Balance Photography

The image above uses soft blacks, grays, and whites to create a calm and even mood. The dark boats and figures stand against the lighter sky and water, but nothing feels too harsh or bright.
Each tone supports the other, keeping the photo balanced and easy on the eyes.
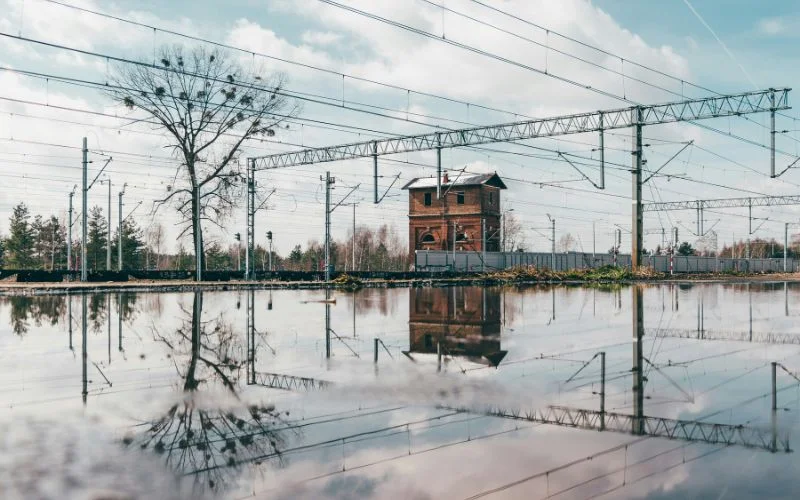
Conceptual Balance Photography

In the above image, on the left, you see modern, clean skyscrapers made of glass and steel. On the right, you see an old, crumbling building with rough textures and broken windows.
Even though the subjects are very different, the photo feels balanced. It is because the contrast tells a clear story: new vs. old, past vs. present.
Final Thoughts
Balance is the magic ingredient that makes a great photo out of a good one. When your composition feels not too heavy on one side and not too light on the other, the viewer remains engaged.
Balance is what makes your images tell more powerful, more obvious stories. So, the next time you raise your lens, slow down, look around, and play with the elements within your composition. A perfectly balanced photo isn’t luck; it’s a decision you make each time you snap!
Frequently Asked Questions
1. Why is balance important in photography?
Ans. Balance helps create visually appealing images that feel intentional and harmonious. It directs the viewer’s eye and strengthens the overall composition.
2. Can a photo be balanced without being symmetrical?
Ans. Yes! Asymmetrical balance is just as powerful. It relies on visual weight rather than mirror-like symmetry, often creating more dynamic and engaging images.
3. How do I know if my photo is unbalanced?
Ans. If your eye feels “stuck” in one corner of the image feels awkward or tilted, it might be unbalanced. Trust your instincts and review your shot using grids or flipping it horizontally.
4. Do professional photographers always follow balance rules?
Ans. Not always. Professionals learn the rules to break them intentionally. Mastering balance helps you make creative choices with confidence.
5. Can editing software help correct balance?
Ans. Absolutely. Cropping, adjusting exposure, and color grading in post-processing can help achieve better balance when the original shot is off.
Like this post? Check out more amazing photography content here.